What to do if Windows does not detect the second hard drive. The second hard drive or the second volume of the hard drive is not visible (windows 10) sees the hdd
People often ask the question on the Internet: “I bought a new hard drive and connected it. Why can't I see the new disk in the system? The point is that after physical installation hard drive into a computer or laptop, you need to programmatically initialize and mark it. So, how to set up a connected new hard drive in Windows 7? Nothing could be simpler.
Update 2016: Despite the fact that the illustrations were taken a long time ago from Windows 7, these instructions are also suitable for Windows 10 and 8.
Step 1. Click right click on the system shortcut “Computer” and select “Management”:
Step 2. In the window that opens on the left, select “ Disk management". After this, a dialog box should open on the right side “ Initializing the disk". Click “OK” in it:

_____________________________
Attention! If you click on " Disk management" dialog box does not open, right-click on the left side of the disk image in the area that says "No data" or " Not initialized" and select " Initialize disk". (See 2 pictures below.)


The task is to call the same window “ Initializing the disk". In it you must make sure that the checkbox next to “Disk n” is checked and click OK.

Step 3. Right-click on the right side of the new disk image and select " Create a simple volume»:

Step 4. Click "Next":

Step 5. Select the partition size. By default, installed maximum size section. Those. the partition will occupy the entire hard drive. If you want the new disk to have several partitions, then at this point select the size of the first partition. For example "10240". Then the new partition (aka “partition”) will occupy 10 GB of disk space.
If to create the first partition on a new hard drive you did not select all the available space (which was the default), then after the created partition there will be unallocated space on the disk. To create additional partitions in the unallocated area, repeat these instructions With steps 3 .
After selecting the partition size, click “Next”:

Step 6. Select a drive letter. Click "Next":

Step 6. Type file system in most cases you need to leave " NTFS". Select the volume label, such as "Games" or "Archive" and click "Next":

Step 7 Click "Finish" to exit the Disk Initialization Wizard:

After this, you will see that the disk has begun to format:

Wait until the caption “Good …” appears on the right side of the disk image instead of the word “Format”:

Now you can open “Computer” and check if a new section with the desired letter has appeared.
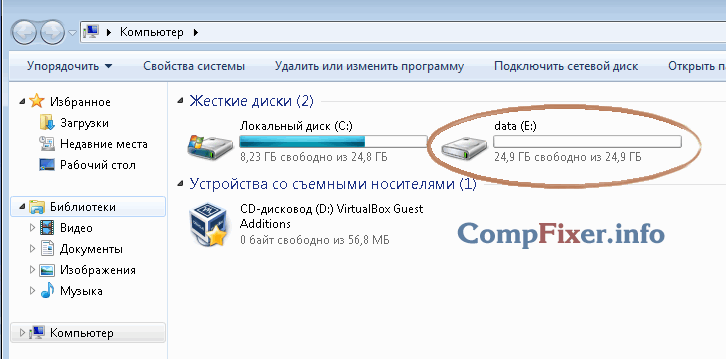
The marking is done. You can use the drive!
Read how to fix external HDD, which is not recognized by Windows. Causes and solutions to the problem of disk non-recognition. In this guide we will try to describe the problem of the external drive not being recognized in the operating system "Windows 10" and imagine possible ways its elimination.
Content:
External hard drive and user data?
Personal computers play a big role in the daily life of every person. We use them for work and entertainment, communicating with friends and communication. In addition to personal computers, other computer devices have been developed that complement and expand the application possibilities. computer technology for each. They greatly simplify any production process, allowing you to create, manage, edit and exchange any projects, documents, tables, presentations, etc. Computers also allow you to receive and send correspondence via Email; process, view or listen to a variety of images, video streams or music; upload, download or exchange any information via the network; receive the latest news and chat with friends in in social networks and much more.
A huge amount of information is constantly stored on personal computers and is used by us constantly when necessary. Various storage devices are used to save data: hard disks And solid state drives, external drives, memory cards, etc. Additionally, computer users can store their information remotely on the Internet on various cloud storage, download, upload and share it at will at any time. You can also use various online services and applications for exchange.
However, no matter how accessible such methods of storing and exchanging information are, users continue to use external drives and drives. Thanks to them, the user always has the information he needs and can use it at any time.
External drives – "USB drives" or external hard drives are very convenient and quite easy to use. But, as often happens, in certain moment, the unexpected may happen. In some cases, you may be able to connect your drive to personal computer With operating system "Windows" or another device using "USB port" and find that the hard drive is not recognized. This problem may be caused by partition problems on your external drive, incorrect file system, corrupted ports "USB", problems with drivers in "Windows" or other problems. In the worst case, the disk itself may simply be completely damaged.
The following steps described will be the same for both flash drives "USB" and large external hard drives, which work in a similar way.
Additionally, you can watch our video: “Windows 10, 8, 7 does not see the hard drive or SSD - How to connect!”. It will help you if after reinstalling "Windows" one of the sections hard drive stopped showing up in "Explorer", or new hard The disk installed in your computer is also not displayed, although it is visible in the settings "BIOS".
Is the disk visible in the application?
First, you need to check if the operating system detects "Windows" your drive when you connect it. Connect your removable drive to your computer. If it's an external hard drive, you may need to set the power switch on the hard drive to "On" to activate it. Some heavy-duty removable hard drives may even need to be connected using a separate power cable before they will work.
Then open the disk management tool provided in the standard set of applications of the operating system "Windows". This tool allows you to carry out full control all disks and partitions located on your computer, internal and external, connected to currently. can be opened different ways
, but we will only show you a few of them. Select any method of your choice for further use. Method one : Press the keyboard shortcut together"Windows + R" and open the dialog box"Run" . In the request field"Open" enter the command"diskmgmt.msc" , then click the button"OK" or key"Enter"

on keyboard. The application will open. Method two : On your desktop, find the file explorer shortcut"This computer" and right-click on it. In the menu that opens, select a section from the list of available actions.

The application will open, which presents all the main controls and settings of computer settings. In the left pane of the window, select the section located at the following address: – –.

Method three "Start", located on "Taskbars" in the lower left corner of the desktop, or press the keyboard shortcut together "Windows + X", and open the pop-up menu. Select section from the list of available applications.

You should see your external drive in the window. And even if it doesn't show up in your computer's file explorer because it doesn't contain any partitions, it should show up here.

If you see your drive here, then you can skip straight to the last section of our guide, where we'll show you how to properly format it so that your operating system "Windows" or other devices could access and recognize it.
If the application does not show your drive, then move on to the next section of the guide, where we will try to determine the reason why your drive is not recognized.
Possible causes and solutions to the problem of disk not being recognized
If the system "Windows" does not see your disk at all, then there may be a hardware problem "USB port" your computer, there is a driver problem, or you may simply have a bad disk.
First disconnect the drive from "USB port" and try connecting it to another "USB port" your computer. If he works in one "USB port" but doesn't work in another, then it's probably yours "USB port" spoiled. If you connected the drive via "USB hub"(a device that allows you to increase the amount "USB ports" and provides the ability to use them simultaneously), then try connecting the drive to the computer directly. Some "USB hubs" may not provide enough power to operate the external drive.
If the disk does not appear in the window even after you remove "USB hub" and connected the disk to another "USB port" on your computer, it's difficult to know for sure whether your drive is bad or perhaps the computer itself is experiencing some problems. If you have another computer nearby, try connecting the drive there to see if it can be detected there. If the drive doesn't work on any computer you connect it to, then it's probably completely damaged and will need to be replaced.
If the disk is detected and works on other computers, then there is a high probability that the operating system "Windows" There are problems with the drivers for your disk. You can check this using the application, which can be opened in various ways. The list of ways to access the application is quite large, but we will describe only three of them.
, but we will only show you a few of them. Select any method of your choice for further use.: Right click on the button "Start", located on "Taskbars" or press the keyboard shortcut together "Windows + X" and open the pop-up menu. Select the section from the list of available applications.

on keyboard. The application will open.: Open the dialog box and open the dialog box, for example, by pressing the keyboard shortcut together : Press the keyboard shortcut together"Run" . In the request field"Open" "devmgmt.msc" and press the key or key or button , then click the button.

Method three: Open the application window in the way we described earlier in this guide. In the left pane of the window, go to the following address: “Computer management (local)” – "Utilities" – .

Find a section "Disk devices" and check for any device with a yellow exclamation mark located near it. This marking disk device means that in the operating system "Windows" There are some problems with the driver for this device. Right click on the device with the yellow exclamation mark, select partition "Properties" and see the error message. This message may help you troubleshoot the problem - you can search for a solution for the specified error on the Internet and fix the problem.

However, not all problems are easy to fix, and they can be quite difficult to fix. If the problem is recent, you may want to run the System Restore process in the initial state using internal tools operating system "Windows". Or in the properties window of the problematic disk, go to the tab "Driver". Then you can use the button "Update driver" to install a new one updated version drivers for your device. Or use the button "Roll back" to undo any changes and revert to the previous driver. Or use the button "Remove device" to remove it from your system and allow the operating system to "Windows" Reinstall the driver yourself and configure it correctly when you reconnect the drive.

Don't forget to press the button , then click the button"OK" or key on the keyboard to save your changes.
Disk partitioning and formatting
you can use standard application "Windows" to fix problems with the partition and file system of the drive. If you see that the selected drive is not partitioned and is marked "Not distributed", then you will have to create a new partition on it. This will allow devices based on "Windows" or other operating systems, use it.
Use any method described above and open the application. Then right-click inside the unallocated space of the connected device and select "Create Simple Volume".

Will be launched "Simple Volume Creation Wizard", which will offer you help creating a volume on the disk. Click the button "Further" to continue.

Then select a volume size between the minimum and maximum values. Typically, the wizard sets the default simple volume size based on the characteristics of your disk. Click the button "Further" to go to the next assistant page.

Assign a drive letter and click the button "Further".

Select whether you want to format this volume and what formatting options to use, or not format it by checking the appropriate box. By default, you will be prompted to format the volume, you just need to choose which file system you will use. Click the button "Further" and go to the last page.

Here in the main window you will see all your selected options, click the button "Ready" and complete the simple volume creation process. If you want to change anything, use the button "Back" to go to desired page "Create a Simple Volume Wizard" and making the required changes.

If your drive is partitioned but you still don't see it in File Explorer, then make sure you assign a drive letter to it so you can access it in your operating system "Windows". As we described above, this happens automatically, but if you manually override the drive letter, the drive may not appear and may not be accessible on the system "Windows".
To assign a drive letter, right-click the removable drive partition, select "Change drive letter or drive path...".

Click the button "Add", and then assign a new drive letter by choosing your option or using the default option. For example, assign a drive letter "D" and it will be reflected in the file explorer under the specified letter. Then press the buttons , then click the button to save changes.

In some cases, the disk may be partitioned, but may have the wrong file system. For example, you can format the disk for the file system "ext4" from "Linux" or file system "HFS Plus" from "Mac". operating system "Windows" cannot read such file systems. Therefore, reformat the disk to a newer file system "NTFS" or more old version file system "FAT32", to "Windows" was able to recognize her.
To reformat a partition, right-click on it, select partition "Format…" and specify the desired file system.
Please note that the formatting process will erase all files on your drive. Therefore, if you want to save all important files, then connect the disk to the file system on which you formatted the disk earlier (for example, if you formatted the disk on a computer with "Linux" or "Mac", then connect it to a computer with appropriate controls) and copy your important files before continuing.

If you can't access the drive from another device, e.g. "DVD player", "SMART" TV, game console or media center, then the disk may be formatted for the file system "NTFS". Many devices, even your own "Xbox 360" from the corporation "Microsoft", can't read "NTFS" from "Windows". They can only access drives formatted with the old file system "FAT32". To fix this problem, simply reformat the partition "NTFS" re-login to the system "FAT32". Now the disk will be recognized when connected to such devices.
Please note that this process will delete files on your external drive. Therefore, if necessary, copy files from the disk to another device.

Click the button , then click the button"OK" or key to start the reformatting process.
By following these steps you should be able to resolve most drive recognition issues you may encounter. If the drive is not recognized by any computer it is connected to and never appears in the application window, then it may be completely damaged and you just need to replace it.
Have you ever tried anything to fix problems with disk recognition? Let us know about this or leave your comments under the article about which methods helped you.
Most users create partitions on their hard drive for their convenience. They are usually called C, D, etc., and their usefulness cannot be denied in any way. Let's say you have an operating system on one volume, and all other user files (music, photos, movies) on the second. When you reinstall the OS, the partition with your files will not even be touched, which will allow you to save the data and continue to use it in the future. new Windows.
One of the extremely common problems that users often encounter is that the computer does not see hard drive partitions and cannot find them. This problem occurs unexpectedly and can be caused by a number of reasons affecting the operation of the hard drive. Let's figure out what to do in this situation and how to solve the problem that has arisen.
If suddenly the volume you need has not only disappeared, but the format has changed to RAW, then to solve the problem, I recommend that you familiarize yourself with.
Assigning a letter
If your PC or laptop does not see one of the hard drive partitions, then the first thing you need to do is go to the special control menu and check whether it is displayed in the corresponding list. If it is there, then it needs to be assigned a letter.
Let's look at the process in order:

The requested information will be instantly displayed on the screen. Must view local disks, and if there is a missing one, then you need to specify a letter.
To do this you need:

For the changes to be successfully applied, you need to restart your computer. As soon as the operating system boots, check whether the partition is visible, it should appear under the letter you specified.
Creating a new volume
It is likely that when you go to the management menu you will not find the missing area, instead there will be an unallocated part that cannot be assigned a letter; you can only create a new volume:

But at the same time, you will completely lose the files stored on it. Therefore, if you do not value them, then feel free to use this method, in other cases I recommend using the method discussed below.
All processes are analyzed into Windows example 7, but in other versions, Windows XP/8/10 they will be similar.
Creating a new partition
If the first method did not help and the computer still does not see the hard drive partitions, then the problem may be that the OS itself cannot see it due to the loss of the file system, as often happens, but the data on it will still be saved.
In this case, to correct the situation, we will use one very effective tool, namely Acronis program Disk Director. With its help, we will recognize the disappeared local hard drive partition, separate a small part from it, from which we will make a new area with the NTFS file system, and then simply merge them.

This may seem very difficult to some, but if you follow the following instructions, which detail what to do in this situation, you will easily cope with this task:

After you create the partition, all that remains is to merge the problematic and new sections using the “Merge” function.
Now you need to save the changes and reboot the system. To do this, you need to enter the BIOS again and return the boot to its original location - from the Hard Disk. After exiting the BIOS, the system will automatically boot into Windows OS. We check the disk partition again, now it should definitely be displayed correctly.
Partition recovery
In almost all cases when a logical partition of a hard drive disappears, it can be returned. For recovery we will use the same Acronis Disk Director.
So here's how to do it:

The procedure for restoring information from a partition that the PC has stopped seeing can take a significant amount of time. The duration of the process depends on the amount and volume of data available on the disk. Therefore, you should be prepared for the fact that the computer may work for quite a long time.
We hope that the methods we have listed for solving the problem are easy to implement, and you can use them to fix the problems that have arisen.
In this short guide, we'll look at how you can partition your hard drive into Windows environment 10. It differs from similar materials in that we use a tool called “Disk Management” to solve this problem. Even though the built-in tool does not have much of the functionality that is inherent in utilities from Acronis or the free AOMEI, it is easy to learn, easy to use, and completely safe.
Launching the application
To run a program in Windows 10 that allows you to partition your hard drive, we will use the control panel.
- Go to the “Control Panel” using the shortcut, the WinX menu or the search bar.
- We launch its applet called “System and Security” when visualizing elements as categories. When displaying elements as icons, move on to the next step.

- In the “Administration” section, click on the “Create and format hard disk volumes” link.

The “Computer Management” window will appear before the user’s gaze, allowing you to divide the hard drive into logical partitions.
Shrink a partition to create a new one
In Windows 10, as well as previous editions of the window OS, you can split the disk into several, using the free space on the original volume/media.
Explanation: if you want to make several from one partition, make sure that there is free space on it, at least a few percent (and preferably 10% due to incredible defragmentation) more than is required to create the partition.
To create a new disk, you need to “bite off” some of the free space from an existing volume.
- Calling context menu partition that we plan to split in Windows 10, and select the “Shrink Volume...” command from the drop-down menu.

- We wait while the hard drive is polled and checked.
The procedure can take up to several minutes on damaged and bulky media, and if there is a fair amount bad sectors on the surface of the magnetic plates of the drive, you will have to check it and then correct the damaged areas.
- At the end of the procedure, a window will appear where you must enter the size of the compressed space.

The specified volume will be used to create new partition(s). The size of the original disk, which it will become after compression, is displayed in the last column.
After a few seconds, the Disk Management utility window will refresh, as a result of which the partition table will change visually slightly: the hard drive will acquire new area called "Undefined".
Create a new section
The disk is compressed, and an unallocated, that is, unused by Windows 10, area is allocated to form a new partition.
- To turn unallocated space into a full-fledged partition, you need to call up its context menu and select “Create a simple volume.”

- In the first window of the simple partition creation wizard, click “Next”.
- In the second window, set the desired volume of the new volume (by default it will be entered maximum value) if you need to create multiple partitions. Otherwise, we don’t touch anything.

- Select a free letter label from the drop-down list and click on the “Next” button.

- In the formatting window, set the desired parameters and click “Next”.
It is better to choose NTFS as a file system due to support for files larger than 4 GB.


After a few seconds, Windows 10 will prepare the hard drive with the new partition scheme for use. Now the new volume can be used to store personal data, install another operating system (for example, any of the Linux distributions), or Windows installations from the hard drive, which eliminates the need to create a bootable USB flash drive.
(Visited 18,676 times, 1 visits today)
With the widespread use of USB, USB 3.0 hard drives have become increasingly popular among computer users in recent years. Like any other device, external HDDs also have their drawbacks, one of which we will consider in this article. After connecting the drive to USB port 3.0, some users encountered problems with the drive being unreadable by their operating system. The drive is not recognized in Windows and does not appear in Explorer.
Don't panic prematurely. Although this problem may seem scary, it can be fixed, and we will help you deal with the issue with a couple of effective solutions. It is not necessary to look for just one among all the methods listed below. Just gradually follow all the steps and the disk will come back to life.
- 1. Restart your computer.
- 2. Check if the hard drive works on another PC.
- 3. Connect other USB devices to see if they work.
Fix Error External USB 3.0 Drive Not Recognized
Method 1: Update USB Driver
1.
Open My computer > select Properties of the system
Alternative way: right click on My computer and select Properties.

2. Open Device Manager located in the left pane.

3. Open USB controllers and next to what you need, if the controller does not have the most latest driver, yellow will appear Exclamation point. Click the device next to it and select Update drivers.

4. Now click on Automatic search updated drivers to install the latest software. Wait for the process to complete and try connecting the hard drive again.

Method 2: Use Disk Management and let the computer recognize the USB 3.0 HDD
1. Open start menu and go to Control Panel.

2. Go to menu Administration and open Computer management.

3. Once the window opens, click Disk management and find the device you need.

4. Right-click on the drive and select Format.
Additional Help
Format the disk and lose it important information may sound very scary for the user, so we will tell you how you can restore your device without losing the necessary files.
Starus Partition Recovery will become good choice for any user who is faced with the problem of hard drive unreadability. The program will not only allow you to recover lost data, but also open logically damaged partitions.
Below is a brief guide that can help you recover information:
1. Connect external hard drive USB disk 3.0 to your computer and run the application. The program will immediately prompt you to scan the device of your choice.

2. Select the logical partition or physical drive you want to scan.

3.
Next, the program will offer you two options for analyzing the disk.
By selecting Quick Scan, the utility will perform a superficial assessment of the device and find all the main files, however, it is worth mentioning that such a scan is not deep. Full analysis, in turn, will scan the device as thoroughly as possible, which will allow you to find any information that has left its trace.

Upon completion of the analysis, you can export documents to any safe place on your computer in two clicks, and then format them external hard disk.
You can evaluate all the chances of “returning data from an unreadable hdd” before registering the program. Download the tool and try it completely free. IN trial version All functions are available, including preview of recovered files.